Lomography Tutorials: Adjustable Nautical Style Camera Strap
1 9 Share TweetTaking style cues from nautical bracelets, we tried our hand at designing and making another DIY strap project. This version of our paracord camera strap is both simple and functional — it can keep your camera secure and give you extra style points at the same time. Inspiration is good but fleeing so it's best to “strike while the iron is hot” and let's get on with it!

Here are the material's you'll need..

- 4 ft (121.92) of 550 paracord (blue)
- 1.5 ft of 550 paracord (white)
- another 1 ft of 550 paracord (white)
- a cigarette lighter
- a pair of scissors
- a small key ring
- ruler
- tape (optional)
Let's begin with the tutorial!
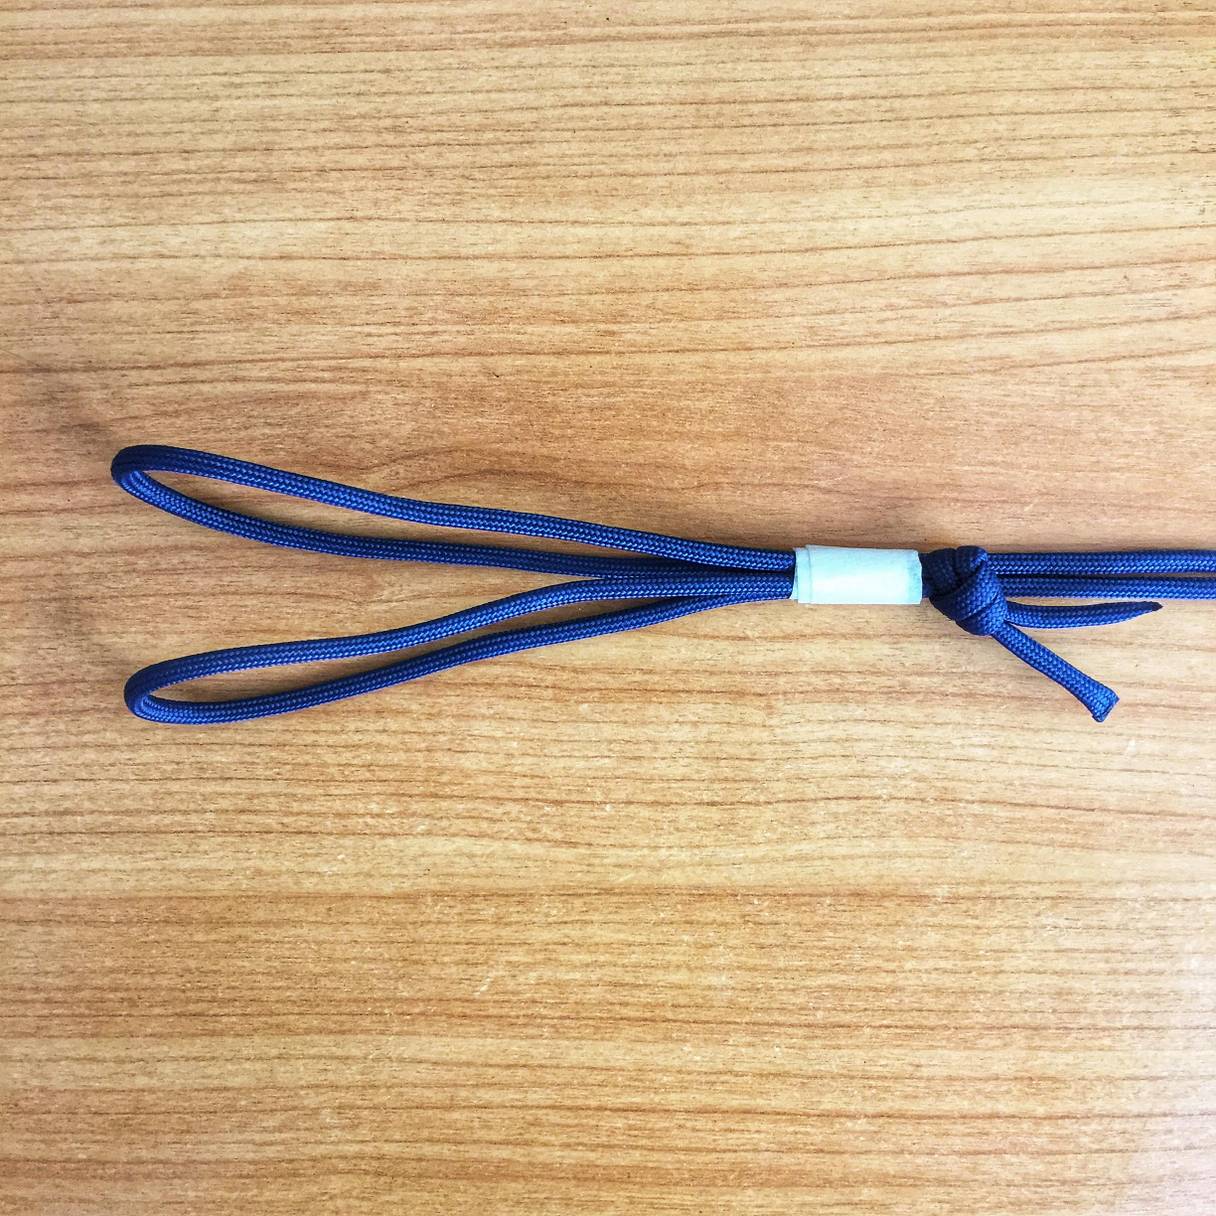
1. Get the two ends of your cord and do an overhand knot.


This will serve as a stopper when you're adjusting the length of your camera strap later on. Take both ends of your blue cord, pull them to the left and then downwards. Pinch the cord and you would have made a loop. Thread both ends into the loop you just created and pull ends to close the knot. Make sure that the knot is secure.
2. Find the bite of your paracord. Create a whipping knot near the end of it to serve as a lock for your strap.


Take your 1 foot-long paracord and create a bite. Make sure that you have the shorter end on top and the longer end at the bottom. Take the longer end of your paracord and wrap it over the both the shorter end and the main strap. You can do four to five wraps over but be sure to keep the wrap tight. It may be better for you to wrap some tape over your strap's main cord to keep them from moving while're your working on your whipping knot.
3. Complete the whipping knot by inserting the long end of your cord into the bite you created for the knot.

This will serve as a lock so your whipping knot doesn't unravel later on. Take the shorter end of your whipping knot and pull. This will close the loop/bite where you threaded the other end of your cord into.
4. Time to create another whipping knot. This time, take the other end you tied an overhead knot with.

Fold it into itself, basically creating two separate bites/loops. It's up to you when it comes to the length of the bites/loops. You can also tape these strands to keep them from moving around while you do another whipping knot.
5. Take the 1.5 feet of white cord and do another whipping knot.


Repeat the steps you took when you did the previous whipping knot on the other end of your strap.
6. Attach the key ring to the first bite you created.

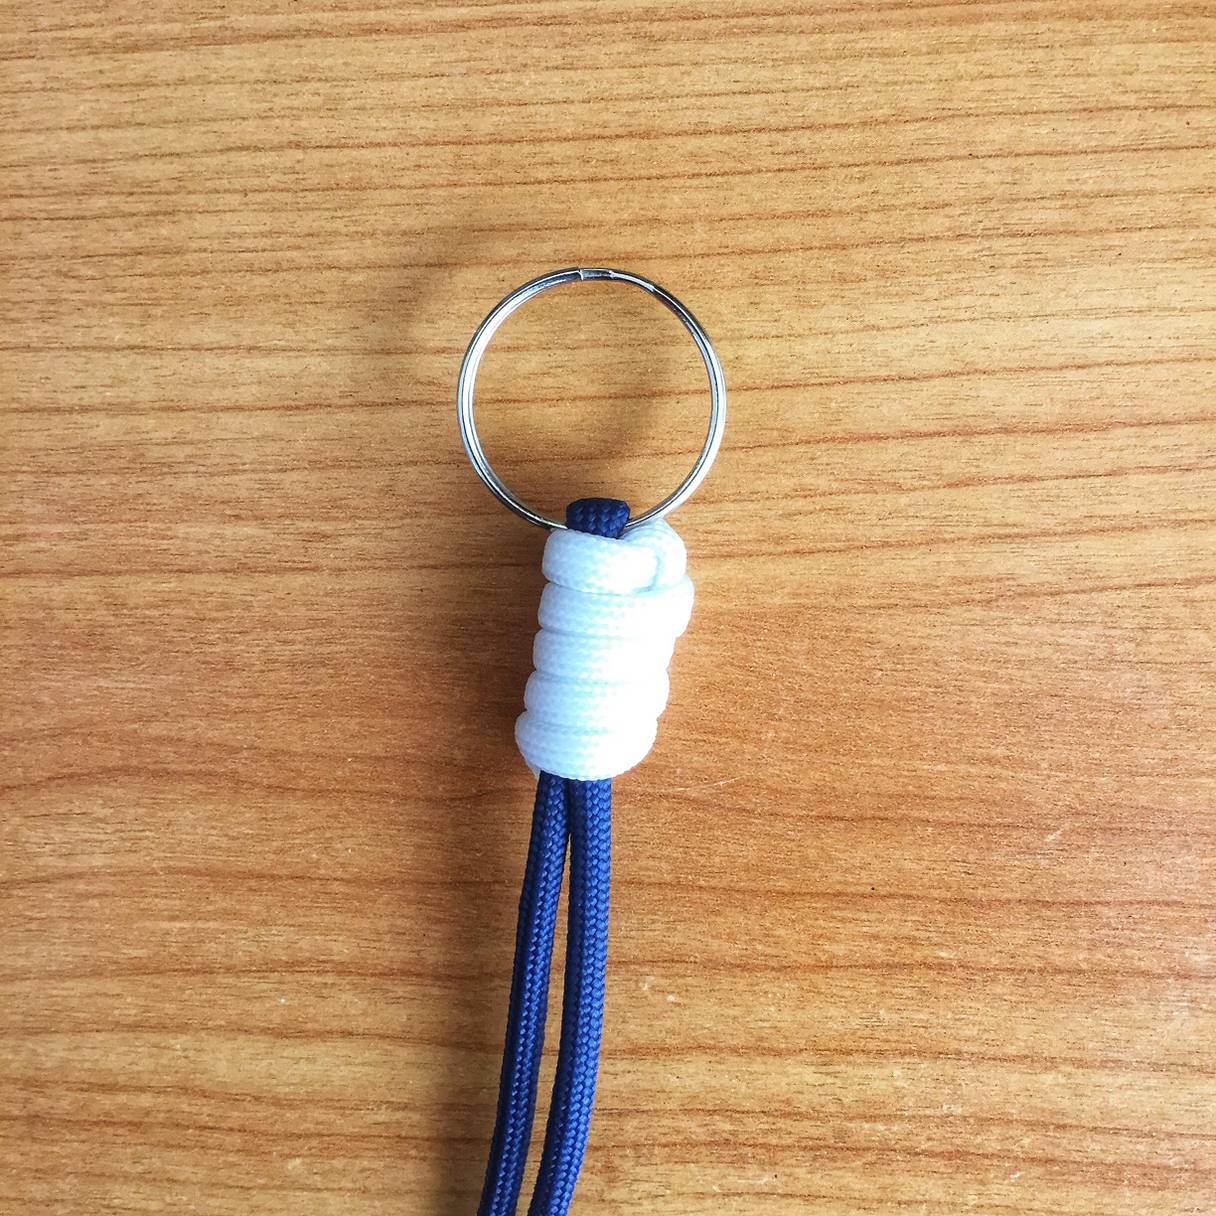
Then you can push the whipping knot up to secure the ring to your strap.
7. Feed the ringed bite/loop into the other end to complete the strap.

This will let you use the camera strap and adjust to your size accordingly.
8. Snip and singe the extra paracord ends on your knots.

Be careful not to cut too short or singe the ends to avoid damage to your strap. Now you're done!


Another DIY project in the bag! Sometimes, being simple and minimalist is the way to go. You can try different color combinations to match your style and mood. Go stealthy with discreet dark colors or easily be spotted with eye-catching vibrant cords — take your pick. But if you're more into other strap designs and colors, be sure to check Online Shop for a wide selection of camera straps.
Let us know in the comments section below if you'd like to see other similar tutorials. Share your finished projects if you tried making one, too!
written by cheeo on 2018-04-27 #gear #tutorials #diy #craft #camera-wrist-strap #paracord


One Comment